Can I Replace My RV Battery with A Lithium Battery
Table of Contents
- Can I Replace My RV Battery with A Lithium Battery
Choosing the right power solution for your RV can significantly impact your travel experience, especially as more RV owners switch to lithium batteries for their superior performance and reliability. Compared to traditional lead-acid options, lithium batteries offer longer lifespans, higher energy efficiency, and faster charging times, making them an ideal choice for modern RVs. This article delves into the key benefits of upgrading to lithium RV batteries, the considerations to address before making the switch, and a step-by-step guide for successful installation. Whether you’re a seasoned traveler or a first-time RV owner, understanding the nuances of lithium battery technology can empower you to make informed decisions for your RV power needs.
Understanding RV Battery Types
When considering an upgrade to your RV’s power system, it’s essential to understand the different types of RV batteries available. The primary categories include lead-acid batteries and lithium-ion batteries, each with distinct characteristics.
1. Lead-Acid Batteries
Lead-acid batteries have been the traditional choice for RV owners due to their affordability and widespread availability. They are further divided into two main types:
1.1 Flooded Lead-Acid Batteries
Flooded lead-acid batteries, also known as wet-cell batteries, contain a liquid electrolyte that covers the internal lead plates. They are known for their cost-effectiveness and reliability. However, they require regular maintenance, including checking electrolyte levels and topping up with distilled water to compensate for water loss during charging. Additionally, they must be installed upright to prevent leakage and are susceptible to spillage and corrosion.
1.2 Absorbed Glass Mat (AGM) Batteries
AGM batteries are a type of sealed lead-acid battery where the electrolyte is absorbed into a fiberglass mat, making them spill-proof and maintenance-free. They offer better deep cycling capabilities compared to flooded lead-acid batteries and are more resistant to vibration, making them suitable for RV applications. AGM batteries also have a lower self-discharge rate, allowing them to hold a charge longer when not in use.
2. Lithium-Ion Batteries
Lithium-ion batteries represent a more advanced technology, offering several advantages over traditional lead-acid batteries. Within this category, Lithium Iron Phosphate (LiFePO₄) batteries are particularly noteworthy.
2.1 Lithium Iron Phosphate (LiFePO₄) Batteries
LiFePO₄ batteries are known for their high energy density, longer lifespan, and lightweight design. They can be discharged up to 100% of their capacity without damaging the battery, providing more usable power compared to lead-acid batteries, which typically allow for only 50% depth of discharge. Additionally, LiFePO₄ batteries charge faster and are more efficient, with minimal energy loss during charging and discharging cycles. They are also maintenance-free and have a low self-discharge rate, making them ideal for RV owners seeking a reliable and efficient power source.
Understanding these battery types is crucial when deciding whether to replace your existing RV battery with a lithium battery. Each type has its own set of advantages and considerations, and the choice will depend on your specific power needs, budget, and maintenance preferences.
Benefits of Upgrading to Lithium RV Batteries
Upgrading to lithium RV batteries significantly enhances your recreational vehicle’s power system by providing unparalleled advantages in terms of efficiency, durability, and convenience. Below are the key benefits of making the switch:
| Features | Lead-Acid Batteries | Lithium RV Batteries |
| Lifespan | 2-5 years, ~500-1,000 cycles | Up to 15 years, ~4,000-6,000 cycles |
| Energy Density | Lower energy density, 50% usable capacity | Higher energy density, 80-100% usable capacity |
| Charging Time | Slower charging time | Faster charging time |
| Weight | Heavier, impacts RV weight | 50% lighter, improves RV efficiency |
| Maintenance | Requires regular maintenance (e.g., adding water) | Virtually maintenance-free |
Lithium RV batteries offer superior performance, reliability, and efficiency, making them the ideal choice for RV owners who prioritize long-term value and convenience. By upgrading, you can enjoy a more reliable power source, reduced maintenance, and an overall enhanced travel experience.
Considerations Before Making the Switch to Lithium RV Batteries
Upgrading your RV’s battery system to lithium RV batteries offers numerous benefits, but there are critical factors to evaluate before making the change. Below, we detail the main considerations to ensure compatibility and a seamless transition.
1. Compatibility with Existing RV Systems
Before switching to lithium RV batteries, it is essential to assess whether your current RV systems support lithium technology. Lithium RV batteries require a compatible battery management system (BMS) to optimize performance and safety. If your RV relies on a traditional lead-acid charging system, modifications may be necessary to prevent overcharging or undercharging the lithium battery. Upgrading the converter or inverter is often required to ensure consistent voltage regulation.
2. Initial Investment Costs
Upgrading your RV’s power system to lithium batteries offers numerous benefits, including longer lifespan, reduced maintenance, and enhanced performance. However, it’s essential to understand the associated initial investment costs to make an informed decision.
Cost Comparison: Lithium vs. Lead-Acid Batteries
| Battery Type | Capacity (Ah) | Price Range (USD) |
|---|---|---|
| Lead-Acid | 100 | $100 – $200 |
| Lithium | 100 | $500 – $1,000 |
Note: Prices are approximate and can vary based on brand and features.
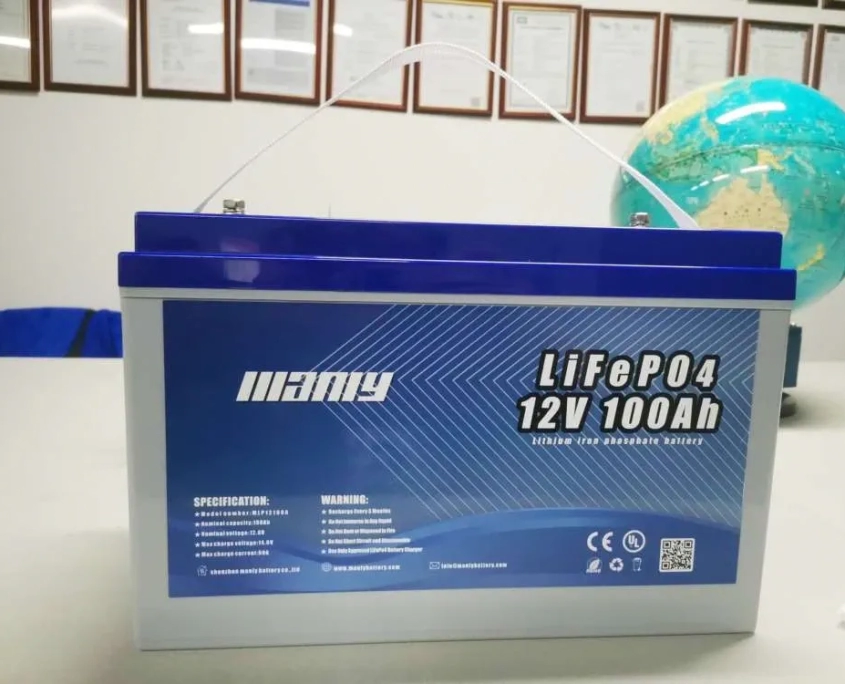
While lithium RV batteries have a higher upfront cost, their extended lifespan—often 10-15 years compared to 2-5 years for lead-acid batteries—can lead to cost savings over time. Additionally, lithium batteries offer more usable capacity and require less maintenance. For example: The MANLY 12V 100Ah Lithium Battery is priced between $180 and $200 (EXW price, factory cost only, excludes shipping, fees, etc.), offering a high-quality solution for RV owners. Its impressive lifespan of 10–15 years and 95% energy efficiency significantly outperform traditional lead-acid options, ensuring long-term value and reduced maintenance.
Additional Equipment Costs
Upgrading to lithium batteries may necessitate enhancements to your RV’s electrical system to ensure optimal performance and safety. Key components to consider include:
| Component | Purpose | Price Range (USD) |
|---|---|---|
| Converter/Charger | Ensures proper charging of lithium batteries | $200 – $600 |
| Inverter (2000W Pure Sine Wave) | Converts DC power to AC, suitable for sensitive electronics | $250 – $500 |
| Battery Monitoring System (BMS) | Monitors battery health and performance | $100 – $300 |
Note: Prices are approximate and can vary based on brand and features.
Total Estimated Initial Investment
Considering the costs of the battery and necessary components, the total initial investment for upgrading to a lithium battery system in your RV can range from $1,050 to $2,400. This estimate includes:
- Lithium Battery (100Ah): $500 – $1,000
- Converter/Charger: $200 – $600
- Inverter (2000W Pure Sine Wave): $250 – $500
- Battery Monitoring System (BMS): $100 – $300
Note: Prices are approximate and can vary based on brand and features.
Total Investment Estimate for Buying MANLY 12V 100Ah Lithium Battery
| Item | Estimated Cost (USD) |
|---|---|
| MANLY 12V 100Ah Lithium Battery | $180 – $200 (EXW price, factory cost only, excludes shipping, fees, etc.) |
| Converter/Charger | $200 – $600 |
| Inverter (2000W) | $250 – $500 |
| Battery Monitoring System | $100 – $300 |
| Total Cost | $730 – $1,600 |
3. Charging System Requirements
Lithium batteries require specific charging parameters to operate efficiently and safely. This means your existing charging system may need adjustments or replacements. For instance, a compatible RV power converter, . Ensuring your charging system is compatible with lithium batteries is crucial to prevent overcharging or undercharging, which can affect battery performance and longevity.such as the PD9260C 60Amp RV Inverter Converter Charger, is priced at approximately $269.99
4. Temperature Sensitivity
Unlike lead-acid batteries, lithium RV batteries are more sensitive to extreme temperatures. While many lithium batteries are equipped with built-in heaters to enable operation in colder climates, consistent exposure to high temperatures can reduce their lifespan. For RVers traveling in varying climates, selecting a lithium battery with robust thermal management features or a battery designed for extreme temperatures is essential.
Understanding these factors will help you make an informed decision when upgrading to lithium RV batteries. With proper planning and adjustments, you can enjoy the enhanced performance and reliability these batteries bring to your RV adventures.
Step-by-Step Guide to Replacing Your RV Battery with a Lithium Battery
Upgrading your RV battery to a lithium battery can significantly enhance power efficiency and reliability. Below is a comprehensive guide to help you through the process safely and effectively.
Step 1: Gather Necessary Tools and Materials
Before starting, ensure you have the following tools and components:
- Lithium battery: Choose a capacity that meets your power needs (e.g., 100Ah for ~$500-$1,000 depending on the brand).
- Battery box: If your new battery is larger than the original, consider purchasing a larger battery box (~$50-$100).
- Wire loom, terminals, and cables: Cost varies, but a spool of 6 AWG wire and terminals may cost ~$30-$50.
- Crimping tool and heat gun: Essential for making secure connections (~$20-$40).
Step 2: Ensure Safety
- Turn off all power sources:
- Turn off the 12V power line using your RV’s power switch.
- Disconnect from shore power to eliminate external electricity flow.
- Remove the existing battery:
- Carefully disconnect the negative terminal first, followed by the positive terminal.
- Avoid touching the terminals simultaneously with tools to prevent shorts.
Step 3: Assess and Prepare the Installation Area
- If you plan to install the lithium battery inside the RV for temperature regulation:
- Choose a storage compartment with proper ventilation and easy access.
- Drill a hole for the wire loom to pass through, ensuring no structural or component obstructions underneath the RV.
- If installing outside:
- Secure the battery in a lockable box to protect it from theft and environmental factors.
Step 4: Modify Electrical Connections
- Extend cables if necessary:
- Use the same gauge wire as the original for compatibility (e.g., 6 AWG).
- Cut and strip the insulation carefully, crimp terminals securely, and use heat shrink tubing for protection.
- Prepare connections:
- Attach terminals to the battery posts but do not connect them yet.
Step 5: Install the Lithium Battery
- Secure the battery in place:
- Use D-rings and straps to fasten the battery securely, preventing movement during travel.
- Connect the terminals:
- Attach the positive terminal first, followed by the negative terminal.
- Install protective caps over the connections to prevent accidental shorts.
Step 6: Verify System Compatibility
- Check the converter and inverter:
- Many RV converters designed for lead-acid batteries are incompatible with lithium batteries.
- If required, replace the converter with a lithium-compatible model, such as the PD9260C 60Amp RV Inverter Converter Charger (~$270).
- If using an inverter for larger appliances, ensure it supports lithium batteries. A 2000W pure sine wave inverter typically costs ~$250-$300.
- Test the system:
- Turn on the RV’s power and test the lights and appliances.
- Monitor the voltage to ensure the battery and system are functioning correctly.
Step 7: Plan for Additional Upgrades
- Solar integration (optional):
- Consider adding a solar charge controller and solar panels for off-grid charging. Costs vary based on capacity but generally start around $300 for a basic setup.
- Battery monitoring system (optional):
- Install a monitoring system to track battery health, voltage, and usage.
Final Notes
Switching to a lithium battery not only increases efficiency but also supports future upgrades such as solar power and larger appliances. By following these steps, you can confidently make the switch and enjoy the benefits of longer battery life and improved performance.
Common Questions and Concerns
When considering the integration of lithium batteries into your RV, it’s essential to address several key questions to ensure a smooth and safe transition.
Can I use my existing charger with a lithium battery?
Lithium batteries require a different charging profile compared to traditional lead-acid batteries. Many standard RV chargers are not designed for lithium batteries, which may result in undercharging or damaging the lithium battery. To ensure compatibility, consider upgrading your charger to one specifically designed for lithium batteries.
How do lithium batteries perform in cold weather?
Lithium batteries can be discharged over a wide range of temperatures, typically from –20°C to 60°C, which makes them practical for use in all-weather conditions faced by many potentially cold temperature applications including RVs and off-grid solar. However, charging a lithium battery in a cold environment can exacerbate the issue of reduced capacity and efficiency while heightening safety risks.
Are lithium batteries safe for RV use?
Lithium batteries are generally safe for RV use when installed and maintained correctly. They offer benefits such as longer lifespan, lighter weight, and faster charging times compared to lead-acid batteries. However, it’s crucial to ensure that your RV’s electrical system is compatible with lithium batteries by adjusting voltage settings as needed. Additionally, proper storage and handling are essential to prevent issues like thermal runaway, which can lead to fires. Always follow manufacturer guidelines and consider consulting a professional when upgrading your RV’s battery system.
By addressing these considerations, you can make an informed decision about integrating lithium batteries into your RV, ensuring enhanced performance and safety.
Conclusion
Switching to lithium batteries for your RV is an investment in efficiency, longevity, and peace of mind. With benefits such as reduced weight, maintenance-free operation, and the ability to power high-demand appliances, lithium RV batteries are a clear upgrade from traditional alternatives. However, ensuring compatibility with your existing RV systems and understanding the associated costs are crucial steps in the process. By carefully evaluating your needs and following the guidelines outlined in this article, you can confidently upgrade your RV’s power system and enjoy enhanced reliability during your adventures. Whether boondocking in the wilderness or navigating urban landscapes, lithium batteries provide the dependable energy solutions that modern RVers demand.


