2025 How to Charge RV Batteries the Right Way: Methods, Tools, and Safety Tips
Table of Contents
- 2025 How to Charge RV Batteries the Right Way: Methods, Tools, and Safety Tips
- Different Ways to Charge RV Battery
- What Are The Different Types Of RV Batteries
- How Long to Charge an RV Battery
- How To Charge a RV Battery: A Simple Step-by-Step Guide
- Step 1: Find Where the RV Battery Is Installed
- Step 2: Disconnect the Cables Safely
- Step 3: Clean Off Any Corrosion on the Terminals
- Step 4: Inspect the Electrolyte Water Level (for Lead-Acid Batteries)
- Step 5: Hook Up the Battery Charger Properly
- Step 6: Disconnect the Charger After Charging Is Complete
- Fastest Way to Charge RV Battey
- Charging RV Battery: How to Stay Safe
- 1. Stick to the Manufacturer’s Charging Instructions
- 2. Use Compatible Charging Equipment
- 3. Maintain Proper Ventilation
- 4. Prevent Overvoltage Conditions
- 5. Monitor Charge Cycles
- 6. Charge on Stable, Dry Surfaces
- 7. Eliminate Spark Hazards
- 8. Restrict Access During Charging
- 9. Inspect Terminals and Electrolytes Regularly
- 10. Isolate Power Before Service
- Charging RV Batteries in Cold Weather: What You Need to Know
- Best Battery Charger Brands for RVs
- Conclusion
- FAQ
- Learn More About Battery
Keeping your RV battery properly charged isn’t just about convenience—it’s about safety, reliability, and long-term cost savings. Whether you’re off-grid in the desert or parked at a full-service campground, knowing how to charge RV battery efficiently makes a big difference in your trip and your gear’s lifespan. This guide breaks down the best charging methods, compares battery types, and walks you through practical tips for faster, safer charging—tailored for both RV beginners and commercial fleet operators. From lithium upgrades to cold weather strategies, here’s everything you need to keep your RV powered and ready for the road.
Different Ways to Charge RV Battery
Choosing the right method for charging RV battery directly affects system reliability, runtime, and maintenance overhead. Below are four proven approaches that align with different RV battery setup needs—each suited to distinct travel and power scenarios.
1. Solar Panels
Solar panel for RV battery charging is ideal for off-grid users who value energy independence and minimal operational costs.
Key Equipment:
High-efficiency monocrystalline or polycrystalline solar panels
MPPT solar charge controller for optimized power conversion
Inverter (DC to AC conversion for appliance use)
Performance Variables:
Sun exposure (angle, season, and intensity)
Panel wattage vs. RV battery size (e.g., a 300W panel can yield ~25Ah/hour under direct sunlight)
Type of battery chemistry (especially important for rv lithium battery charging profiles)
Commercial Note:
For fleet operators or OEM conversions, integrating rooftop solar adds long-term ROI by reducing generator runtime and fuel costs. It’s also a scalable option—panels can be daisy-chained for larger systems.
2. Alternators
Using your vehicle’s alternator allows you to charge RV battery while driving, which is useful for mobile setups without fixed charging stations.
Required Hardware:
DC-DC battery charger (ensures correct voltage and current regulation)
Important Considerations:
Avoid direct alternator-to-battery connections; they may shorten rv lithium battery lifespan.
A properly sized DC-DC charger protects the alternator and delivers the correct multi-stage charge.
Real-World Tip:
Fleet RVs with frequent driving cycles benefit from alternator charging as a baseline method. Just ensure you’re using chargers compatible with both AGM and lithium battery technology.
3. Shore Power
Shore power is the most dependable method to connect RV battery to a fixed charging source, making it standard for commercial RV parks and seasonal operations.
System Components:
30A or 50A RV power cord
Onboard RV battery converter or hybrid inverter/charger
Safety Guidelines:
Verify that incoming power matches your RV’s voltage rating.
Routinely inspect all cables and terminals.
For Operators:
Shore power reduces generator hours, lowers emissions, and ensures full overnight charging—especially critical for rental fleets or service vehicles with tight daily schedules.
4. Generator
Generators offer a reliable, mobile way to charge RV batteries, especially when traveling off-grid or in emergency power situations.
Generator Types:
Gasoline
Propane
Dual-fuel options
Charging Optimization:
Use inverter generators for cleaner sine wave output
Pair with a smart charger to protect your rv battery and speed up charging
Noise Consideration:
Typical sound output ranges from 50 to 65 dB. For commercial or community campgrounds, opt for low-noise units with enclosed frames.
What Are The Different Types Of RV Batteries
Choosing the right RV battery depends on how often you travel, how much power you use, and how much maintenance you’re willing to handle. Most RV systems today rely on one of three battery types: Lead-Acid, AGM, and RV lithium battery—each built for different operational priorities and budgets.
1. Lead-Acid Batteries
Lead-acid batteries remain the go-to choice for RV owners on a tight budget.
If you’re sourcing batteries for an entry-level rv battery setup, lead-acid options offer the lowest upfront cost. These flooded batteries require routine service, such as topping off water levels and checking for corrosion. Most provide 300–500 cycles and last about 2–3 years with proper care.
Key specs:
Charge cycle range: 300–500
Average lifespan: 2–3 years
Charging method: Compatible with standard rv battery converter
Maintenance needs: High (water refill, terminal cleaning)
Pros:
Lowest capital cost
Easy to find replacements
Compatible with most connect rv battery setups
Cons:
Regular maintenance required
Prone to leaks and off-gassing
Limited lifecycle and efficiency
Best for: Occasional RV users who don’t mind regular upkeep and want the most cost-effective option.
2. AGM (Absorbed Glass Mat) Batteries
AGM batteries are a sealed upgrade from flooded lead-acid types, offering better safety and performance.
If your clients want a no-maintenance battery that installs in any position, AGM is a smart middle-ground. They use absorbent glass mats to hold the electrolyte, making them spill-proof and more durable under vibration. Expect 500–1,000 cycles and a lifespan of 4–6 years, depending on charge depth and usage.
Key specs:
Charge cycle range: 500–1,000
Average lifespan: 4–6 years
Charging time: Faster than flooded lead-acid
Self-discharge rate: Very low
Pros:
Maintenance-free
Faster charging and lower discharge loss
Safer in off-grid and mobile environments
Excellent resistance to shocks and vibrations
Cons:
Higher price than lead-acid
Heavier and bulkier than lithium options
Best for: RV owners seeking a balance between price, safety, and convenience—especially those not ready to move up to lithium.
3. Lithium (LiFePO₄) Batteries
RV lithium battery technology—especially LiFePO₄—delivers the best long-term value for commercial fleets and full-time RV users.
These batteries are engineered for long life (8–10 years) and high performance, typically offering 2,500 to 5,000 charge cycles. Built-in Battery Management Systems (BMS) protect from overcharge, deep discharge, and thermal issues. Though they cost more up front, lithium units dramatically reduce long-term charging an rv battery expenses.
Key specs:
Charge cycle range: 2,500–5,000
Average lifespan: 8–10 years
Charging method: Must pair with a lithium-compatible charger or charge rv battery with solar panel
Weight: 50–70% lighter than lead-acid
Pros:
Longest service life
Ultra-light and space-efficient
Rapid charging with high energy density
No maintenance
Low self-discharge—ideal for solar panel for rv battery charging
Cons:
Higher upfront investment
Incompatible with standard converters without upgrades
Requires attention to temperature when charging
Best for: Full-time RVers, commercial fleet operators, or any application where ROI, weight savings, and reliability are critical over time.
Commercial Buyer Considerations
For B2B procurement teams comparing battery types, consider these technical and cost-related benchmarks:
| Battery Type | Lifespan (Years) | Charge Cycles | Maintenance | Cost (USD/Unit) | Charging Compatibility |
|---|---|---|---|---|---|
| Lead-Acid | 2–3 | 300–500 | High | $100–$150 | Basic converters |
| AGM | 4–6 | 500–1,000 | None | $180–$300 | Standard chargers |
| Lithium | 8–10 | 2,500–5,000 | None | $600–$1,200 | Lithium-specific setup |
How Long to Charge an RV Battery
Charging time depends on several variables—battery capacity, charger output, temperature, and battery chemistry all play a role. For most standard setups, a full charge can take anywhere from 2 to 12 hours, depending on configuration and conditions.
1. Key Factors That Affect Charging Time
If you’re sourcing RV batteries for fleet or off-grid systems, consider these variables that directly impact charge duration and operational uptime:
Battery Capacity (Ah)
Larger amp-hour ratings take longer to recharge.
A 100Ah rv lithium battery will need more time than a 50Ah unit when using the same charger.
Charger Output (Amps)
Faster charging comes from higher-output chargers.
A 20A charger will refill a 100Ah battery in roughly 5 hours (100 ÷ 20 = 5).
State of Charge (SoC)
Charging from 20% to 100% is slower than topping off from 80% to 100%.
Deeper discharges increase charging time.
Battery Type Comparison
| Battery Type | Typical Charging Time | Notes |
|---|---|---|
| Lead-Acid | 6–12+ hours | Absorption phase slows final 20% |
| AGM | 5–10 hours | Slightly faster, but still voltage-limited |
| LiFePO₄ | 2–5 hours | Accepts high-current input; faster turnaround |
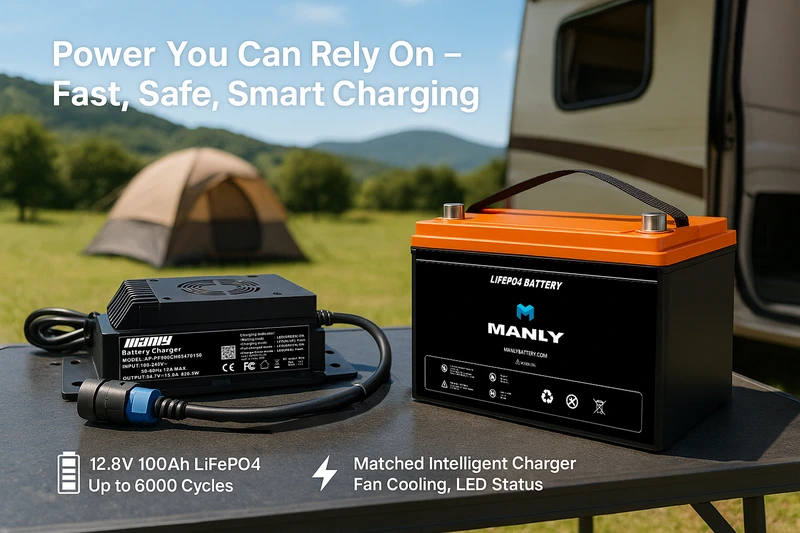
LiFePO₄ batteries like those from MANLY Battery can handle higher charge rates safely, making them ideal for RV applications that require fast recharging cycles.
2. Real-World Charging Time Example
For estimation:
Charging Time (hrs) = Battery Capacity (Ah) ÷ Charger Output (A)
Example:
Charging a 100Ah battery with a 20A charger:100Ah ÷ 20A = 5 hours
Actual time may be longer due to efficiency losses, ambient temperature, and battery management system limits.
3. Fast vs. Slow Charging: Operational Tradeoffs
Fast Charging
✔ Pros:
Minimizes downtime
Ideal for mobile operations with limited charging windows
✖ Cons:
Generates more heat
May shorten lifespan if not regulated
Slow Charging
✔ Pros:
Reduces internal stress on the battery
Promotes longer battery lifespan
✖ Cons:
Time-intensive
Less practical for high-turnover or mobile RV fleets
4. MANLY RV Lithium Battery Charging Advantage
If you’re managing a commercial RV fleet or OEM system design, MANLY’s rv lithium battery solutions stand out for charge efficiency. Each unit integrates:
High-efficiency BMS
Fast-charge compatibility
Smart energy conversion modules
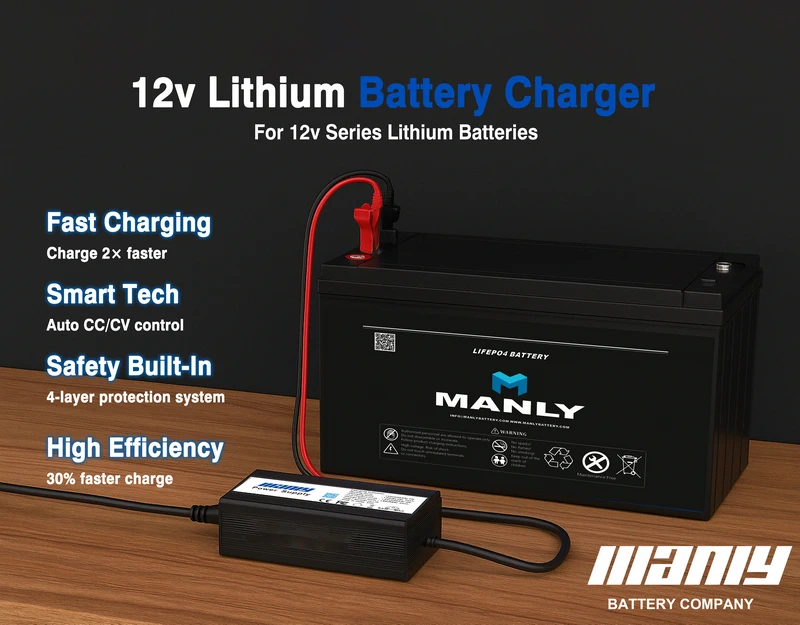
With MANLY’s modular charger design, users achieve 20%–30% higher power conversion rates, significantly reducing both charging time and energy waste. This means your operation spends less time charging an rv battery and more time on the road.
How To Charge a RV Battery: A Simple Step-by-Step Guide
Properly charging an RV battery starts with safe handling and ends with a stable, full charge. Follow this step-by-step guide to minimize risk, extend battery lifespan, and ensure compatibility with your existing RV battery setup.
Step 1: Find Where the RV Battery Is Installed
Before any action, identify where the rv battery is mounted. Common locations include:
Under the RV chassis
Inside a vented battery bay
In a compartment behind an exterior access panel
Always turn off the main power breaker and disconnect all AC/DC sources before you begin to avoid electrical hazards.
Step 2: Disconnect the Cables Safely
Use an insulated wrench to disconnect rv battery terminals. Always disconnect in this order:
Negative (–), usually black
Positive (+), usually red
This prevents accidental shorts or arc flashes. Make sure no metal tools bridge both terminals at once.
Step 3: Clean Off Any Corrosion on the Terminals
Inspect terminals for signs of oxidation or corrosion. Clean them with:
A wire brush or dedicated battery terminal cleaner
A mix of baking soda and distilled water (for lead-based systems)
Apply a terminal protector spray or dielectric grease after cleaning to reduce future corrosion risk—especially in humid or coastal climates.
Step 4: Inspect the Electrolyte Water Level (for Lead-Acid Batteries)
If you’re working with flooded lead-acid batteries, open the vent caps and inspect electrolyte levels. Use only distilled water to top off cells. Never overfill, as it may cause acid overflow during charging.
Skip this step for sealed AGM and rv lithium battery systems.
Step 5: Hook Up the Battery Charger Properly
Match the charger to the battery type and capacity. For rv lithium battery systems, only use lithium-compatible smart chargers. Connect in this sequence:
Positive clamp to the positive terminal
Negative clamp to the negative terminal
Verify voltage and amp settings align with your battery specs (e.g., 12.8V for LiFePO₄, 13.6V for AGM).
For fleets using RV battery converter setups, ensure that integrated systems support the required charge profile and cut-off voltages.
Step 6: Disconnect the Charger After Charging Is Complete
Once charging is complete, power off the charger and unplug it. Remove clamps in reverse order:
Negative
Positive
Use a digital multimeter to confirm the battery is fully charged—typically:
12.6–12.8V for lead-acid
13.3–13.6V for LiFePO₄ (resting voltage)
If you’re setting up new systems or need to connect rv battery for the first time, refer to your converter or power distribution panel instructions to avoid grounding or polarity issues.
Fastest Way to Charge RV Battey
To reduce vehicle downtime and extend system efficiency, the fastest way to charge RV battery is by combining high-current smart chargers with rv lithium battery technology under controlled conditions. Below is a step-by-step strategy optimized for B2B RV system integrators and OEM deployments.
1. Use a High-Amperage Smart Charger (40A–60A)
High-output smart chargers (40A to 60A) drastically cut charging time by delivering rapid bulk-phase current while automatically adjusting voltage to the battery’s condition. For example:
| Battery Size | Charger Output | Time to 80% SoC |
|---|---|---|
| 100Ah | 50A | ~1.5 hours |
Note: The final 20% of the charge may take longer due to the constant-voltage absorption phase—especially in lead-acid systems.
Best for: RV fleets or OEMs requiring quick battery turnover during short layovers or mobile operations.
2. Choose Lithium Batteries for Rapid Charging
RV lithium batteries—especially LiFePO₄ cells—support higher charge acceptance rates, making them significantly faster than flooded or AGM alternatives.
Key benefits:
Up to 4x faster charging than traditional batteries
Can safely accept higher amperage without degrading cell chemistry
Ideal match for high-current chargers and solar + generator hybrids
Example: A MANLY 12.8V 100Ah lithium battery can fully charge in 2–3 hours with a 50A charger, thanks to efficient lithium battery technology and integrated BMS protection.
3. Combine Generator and Solar Charging
When shore power isn’t available, a dual-source system maximizes charging throughput.
Strategy:
Use a fuel-powered generator as the primary charging source
Supplement with solar panel input during peak sunlight hours
Connect both sources to a smart MPPT controller or RV battery converter for real-time power balancing
This hybrid approach is especially useful for off-grid RV operations or rental fleets operating in remote terrain.
4. Control Temperature for Optimal Charging
Charging performance drops sharply outside of safe temperature thresholds. Lithium batteries, in particular, may limit current intake below 0°C or above 45°C.
Best practices:
Install battery packs in temperature-controlled or ventilated enclosures
Avoid charging an RV battery during peak midday heat
Consider BMS-equipped lithium models that auto-regulate charge in varying environments
Reference: DOE and UL recommend 20°C–25°C (68°F–77°F) as optimal charging conditions for most lithium chemistries.
5. Confirm Charging Status with a Multimeter
After rapid charging, validate battery state with a multimeter:
LiFePO₄ (fully charged): 13.3–13.6V resting
AGM/Lead-Acid: 12.6–12.8V resting
A drop below 12.0V indicates undercharging or high internal resistance
For system-wide monitoring, integrate voltage sensors into your RV battery setup and ensure charger shutoff thresholds align with battery specifications.
Charging RV Battery: How to Stay Safe
To protect equipment and personnel, follow strict protocols when charging RV battery. Improper handling can result in costly damage, reduced battery lifespan, or safety hazards—especially in B2B RV, OEM, or fleet applications.
1. Stick to the Manufacturer’s Charging Instructions
Start with the basics: always refer to the technical manuals provided by the battery and charger manufacturers. Key safety parameters often include:
Maximum voltage and current settings
Recommended charge profile (bulk, absorption, float)
Temperature cutoffs for rv lithium battery charging
If you’re sourcing systems across mixed fleets, standardize battery types where possible to simplify compliance.
2. Use Compatible Charging Equipment
Using a mismatched charger is one of the fastest ways to degrade battery health.
| Battery Type | Required Charger Type | Risk of Mismatch |
|---|---|---|
| Lead-Acid | 3-stage smart charger | Sulfation, overcharge |
| AGM | Voltage-limited smart charger | Shortened cycle life |
| Lithium (LiFePO₄) | Lithium-specific charger (with BMS support) | BMS shutdown or fire risk |
Avoid generic chargers. For example, rv lithium battery systems require charge curves specifically tuned to LiFePO₄ chemistry.
3. Maintain Proper Ventilation
Charging in confined or poorly ventilated spaces—especially with flooded lead-acid batteries—can lead to hydrogen gas accumulation and thermal spikes.
Best practice:
Charge in open or well-ventilated areas
Never charge near flammable materials or in sealed storage bays
Monitor for signs of heat buildup in enclosed systems
4. Prevent Overvoltage Conditions
Overcharging leads to internal heat buildup, swelling, and potential cell failure. To prevent this:
Use smart chargers with voltage limiters
Confirm your battery includes overcharge protection or a built-in Battery Management System (BMS)
Don’t bypass the BMS in lithium units during bulk charge
Note: Overcharging is especially damaging during the final 10% of charge in lithium cells.
5. Monitor Charge Cycles
Use a voltmeter, Bluetooth-enabled battery monitor, or an integrated energy management system to track charging behavior.
Lithium batteries: Fully charged = 13.3–13.6V
Lead-acid: Fully charged = 12.6–12.8V
Unexpected voltage drops may indicate a problem with the charger or rv battery
Never leave a battery charging unattended—especially in fleet environments or temporary field camps.
6. Charge on Stable, Dry Surfaces
Avoid placing batteries:
On uneven, unstable surfaces
Near fuel, lubricants, or solvents
Inside tents or garages without airflow
Instead, use flat, dry platforms with access to ventilation. Many companies set up designated rv battery charging zones to comply with OSHA or UL recommendations.
7. Eliminate Spark Hazards
Before you connect rv battery clamps or disconnect rv battery cables:
Shut off all AC/DC power sources
Wear insulated gloves
Use non-conductive tools rated for battery applications
This reduces the risk of arcing—especially when operating in high-humidity or damp environments.
8. Restrict Access During Charging
For site safety:
Post warning signs around the charging zone
Prevent children or unauthorized personnel from entering
Keep pets away from wiring and exposed terminals
This is especially important in shared workspaces, campgrounds, or mobile construction setups using RVs for power or housing.
9. Inspect Terminals and Electrolytes Regularly
To ensure safe and consistent charging:
Inspect terminals for corrosion or wear
Tighten loose cable lugs or brackets
Check battery enclosure integrity (seals, mounts, vent holes)
Incorporate monthly battery audits into your preventive maintenance program—especially for commercial RVs or off-grid service fleets.
10. Isolate Power Before Service
Always de-energize systems before working on wiring, chargers, or battery modules.
Turn off the rv battery converter
Disconnect both AC shore input and DC fuse lines
Wait 2–3 minutes for capacitors to discharge in smart chargers
This step protects technicians from unexpected surges and complies with UL 458 and NFPA 70E electrical safety standards.
Charging RV Batteries in Cold Weather: What You Need to Know
Charging an RV battery in subfreezing temperatures requires extra precautions—especially for lithium systems. Improper handling may permanently reduce battery lifespan or lead to system failure.
1. How Cold Affects Different RV Battery Types
Battery chemistry plays a key role in cold-weather performance. Here’s what procurement teams and maintenance managers should know:
| Battery Type | Cold Weather Behavior | Charging Limitations |
|---|---|---|
| Flooded Lead-Acid | Electrolyte thickens, increasing internal resistance; risk of freezing below 20°F (–6°C) | Can charge, but with reduced efficiency |
| AGM | Better cold start power (higher CCA); more stable than flooded | Still slower to charge below 32°F |
| RV Lithium Battery (LiFePO₄) | Discharge possible to –4°F, but charging below 32°F can cause lithium plating | Requires heating system to charge safely |
If you’re sourcing lithium batteries in cold weather, confirm whether the unit includes a lithium battery heater or needs external solutions.
2. Solutions for Cold Climate Charging
To protect both the battery and vehicle systems, deploy temperature control measures when charging RV battery in low-temperature environments.
A. Lithium Battery with Heater (Built-In)
OEM models like MANLY rv lithium battery feature integrated heating modules that automatically warm cells before charging. These systems activate at around 32°F (0°C) and enable safe charging even at –22°F (–30°C).
B. External Heating Pads
If your lithium pack lacks a built-in heater, apply thermostatically controlled pads. These attach externally and begin warming around 42°F (5.5°C). Choose UL-rated models to ensure safety during long-term operation.
C. Insulated Battery Enclosures
Use foam-lined or thermoplastic housings to stabilize internal temperatures. Ideal for storage compartments located in the RV’s exterior zones.
3. Regional Use Case Considerations
Cold climate demands vary significantly depending on the deployment region. Here’s how temperature averages influence battery system selection:
| Region | Avg. Annual Temp | Winter Lows | Recommendation |
|---|---|---|---|
| Norway, Sweden | 39–45°F (4–7°C) | Below –4°F (–20°C) | Use lithium batteries with built-in heaters |
| Alaska, USA | ~28°F (–2°C) | Below –20°F (–29°C) | External heating or heated lithium battery systems |
| Minnesota, USA | 38–45°F (3–7°C) | Down to –60°F (–51°C) | Always preheat before charging |
In regions like Alaska or Northern Europe, lithium battery heater technology isn’t optional—it’s essential to ensure safe operation across charge cycles.
4. Cold Weather Charging Best Practices
To minimize risk and extend battery lifespan, implement the following procedures during winter operations:
Monitor Cell Temperature
Use a BMS that includes thermal sensors. Halt charging if the pack drops below 32°F (0°C).Preheat the Battery
Activate built-in or external heaters to reach safe operating temps before initiating charge cycles.Never Charge Below Freezing (Without Heating)
Charging lithium below 32°F without a warming system may lead to internal damage that cannot be reversed.Inspect Post-Usage
After cold exposure, check battery terminals, case integrity, and wiring for signs of stress or corrosion.
Best Battery Charger Brands for RVs
When selecting a battery charger best brand for RV operations, performance, safety, and compatibility with both rv lithium battery and lead-acid systems are critical. Below are top-rated battery charger manufacturers known for building reliable, scalable, and efficient solutions for modern RV energy systems.
MANLY Battery
If you’re sourcing chargers directly from a high-performance, OEM-focused factory in China, MANLY stands out as a premium china battery charger brand offering robust solutions tailored for RV and LiFePO₄ systems.
Why MANLY ranks among the best:
High Conversion Efficiency (20–30%)
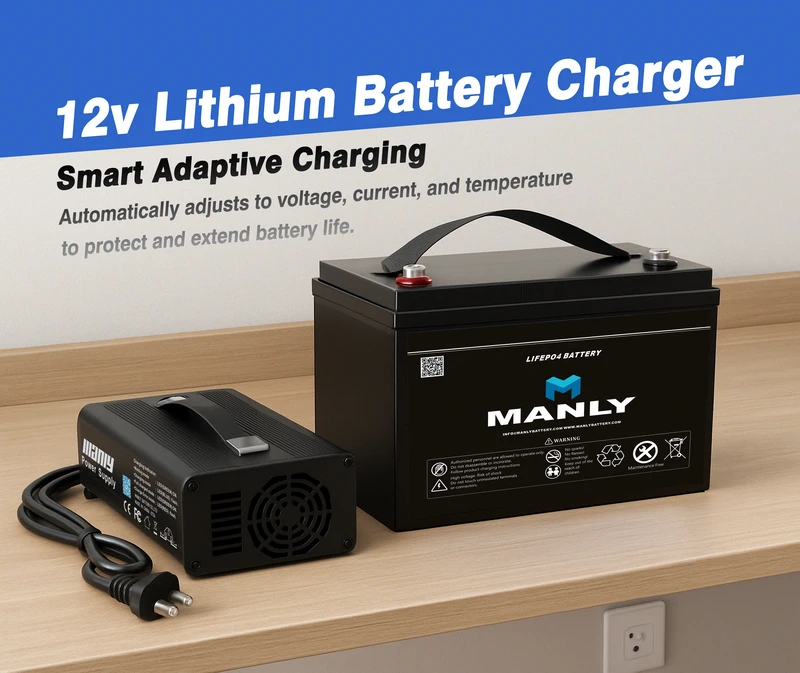
MANLY chargers feature integrated power modules that deliver faster charge cycles with minimal energy loss—ideal for solar-powered RV setups or limited generator runtime.Smart Adaptive Charging Logic
Real-time monitoring adjusts voltage, current, and temperature dynamically, preventing overcharge or thermal runaway—extending rv battery life.Broad Compatibility
Supports both lead-acid and lithium chemistries, making it ideal for RV fleets with mixed battery technologies.Advanced Protection Features
Short-circuit, thermal, reverse polarity, and over-voltage safeguards ensure safety in mobile environments.Compact & Rugged Design
Lightweight aluminum housings withstand vibration, heat, and road stress—critical for long-distance RV travel.Long Service Life (5+ Years)
Built with industrial-grade components, MANLY chargers are engineered for durability, reducing long-term replacement costs.
Renogy
Renogy has built its name around solar storage and renewable energy solutions. Their battery charger brand is ideal for RVers who integrate multiple charging sources (solar, alternator, shore).
Notable Features:
Dual Input DC-DC Chargers
Draws power from alternator and solar simultaneously—excellent for hybrid energy RV setups.Multi-Stage Charging (Bulk/Boost/Float)
Optimized for lithium and lead-acid batteries, improving battery lifespan and performance.Comprehensive Safety Protections
Includes over-temp, reverse polarity, and voltage safeguards—supporting safer, autonomous charging an rv battery.Bluetooth Integration
Offers remote charger control and diagnostics via the Renogy app—valuable for modern off-grid RV configurations.
Battle Born Batteries + Victron Energy
This integrated setup is favored by RVers seeking a fully managed rv lithium battery power system.
System Highlights:
Battle Born LiFePO₄ Batteries
Known for long cycle life and BMS-enabled safety.Victron MultiPlus Inverter/Charger
Delivers high-efficiency AC/DC power conversion and intelligent multi-source charge blending.Real-Time Monitoring Tools
Includes the BMV-712 and VictronConnect app for precise charge cycle tracking and battery status control.Pre-Assembled Kits
Simplifies installation for RV dealers and custom builders integrating lithium systems with inverter/charger units.
NOCO
As a long-established battery charger manufacturer in the U.S., NOCO’s Genius Series is widely adopted in the RV industry due to its portability and compatibility with mixed voltage setups.
Key Strengths:
6V/12V/24V Multi-Voltage Support
Compatible with lithium, flooded, AGM, and gel cell batteries—great for maintenance crews handling various battery types.Force Mode for Deep Discharge Recovery
Can revive batteries with near-zero voltage—a unique feature for older RV systems or backup battery banks.Thermal Compensation & Spark-Proof Tech
Automatically adjusts to ambient temperature; safe for field use in variable climates.
Progressive Dynamics
Trusted by RV OEMs across the U.S., Progressive Dynamics is a consistent battery charger factory choice for plug-and-play battery maintenance.
Product Differentiators:
Inteli-Power Series with Charge Wizard
Microprocessor-managed charging automatically shifts between bulk, absorption, and float modes.Suits Lead-Acid & Lithium
Works with all common RV battery types; perfect for users transitioning from legacy batteries to lithium.Low-Maintenance Operation
Ideal for extended campground stays or stored RVs—keeps batteries topped off without overcharging.
Victron Energy
For RVers demanding advanced system integration, Victron is widely considered the battery charger best brand for modular power control.
Why Victron excels:
Smart Battery Chargers with App Control
Bluetooth-enabled; users can adjust parameters, view historical data, and monitor remotely.Flexible Integration
Works seamlessly with solar inverters, rv battery converter setups, and advanced BMS systems.Global Support
Though based in the Netherlands, Victron offers service and components across North America—ideal for cross-border fleet deployment.
Conclusion
Knowing how to charge RV battery the right way empowers you to avoid unexpected breakdowns, protect your equipment, and get the most out of your investment. Whether you rely on solar panels, alternators, generators, or shore power, each method has its role—especially when paired with the right battery type and charger. Lithium batteries offer top-tier performance, while smart charging tools like those from MANLY Battery ensure faster, safer results. As you plan your next adventure or manage a commercial RV fleet, stick to the guidelines in this guide to extend your battery’s lifespan, lower maintenance costs, and drive with confidence in any environment.
FAQ
1. Will shore power charge my RV batteries?
Yes, shore power will charge your RV batteries—but only if your RV is equipped with a built-in converter or inverter-charger. These systems convert 120V AC from shore power into 12V DC to recharge the rv battery. Most modern RVs come with an automatic charging setup that begins charging as soon as you’re plugged in. However, older models may require a manual switch or updated charger to ensure proper battery management and avoid overcharging.
2. What size solar panel to charge RV battery?
To charge an RV battery effectively, a solar panel rated between 100W and 400W is typically recommended, depending on your battery size and daily energy usage. For example, a 12V 100Ah rv lithium battery requires roughly 300W of solar panels under full sunlight to charge completely in one day. Factors like panel efficiency, location, and average sun hours also affect output, so it’s important to size your system based on both battery specs and your off-grid usage habits.
3. How do you charge a dead RV battery?
To charge a dead RV battery, use a smart multi-stage battery charger that matches your battery type (lead-acid, AGM, or rv lithium battery). First, disconnect the battery and inspect for visible damage. Then, connect the charger, ensuring proper voltage and amp settings. For severely discharged lithium batteries, choose a charger with a “boost” or “recovery” mode. If the rv battery won’t accept charge after 15–20 minutes, it may require professional testing or replacement. Always follow the battery manufacturer’s instructions to avoid damage or safety hazards.

